
Every year I like to make different Christmas ornaments with my students. I tend to change it up so that I can try making all of the ones I find on Pinterest. I mean, who doesn't love Pinterest...I'm obsessed with pinning every idea that I find. It saves me so much time to find what I'm looking for. Here are a few that we made this year!


Here are some that we made last year.


But I would have to say that my most favorite ones that I do every year is the applesauce and cinnamon ornaments.
OMG, it makes the room smell soooo good and the kids 'LOVE' helping mix the ingredients together. It tends to get a bit messy, but I'm all about the 'hands on' experience! After we make the dough, they get to pick their favorite cookie cutter shape to make their ornament.

I use a drinking straw to make a hole on the top so that when it dries, I can then insert the yarn.

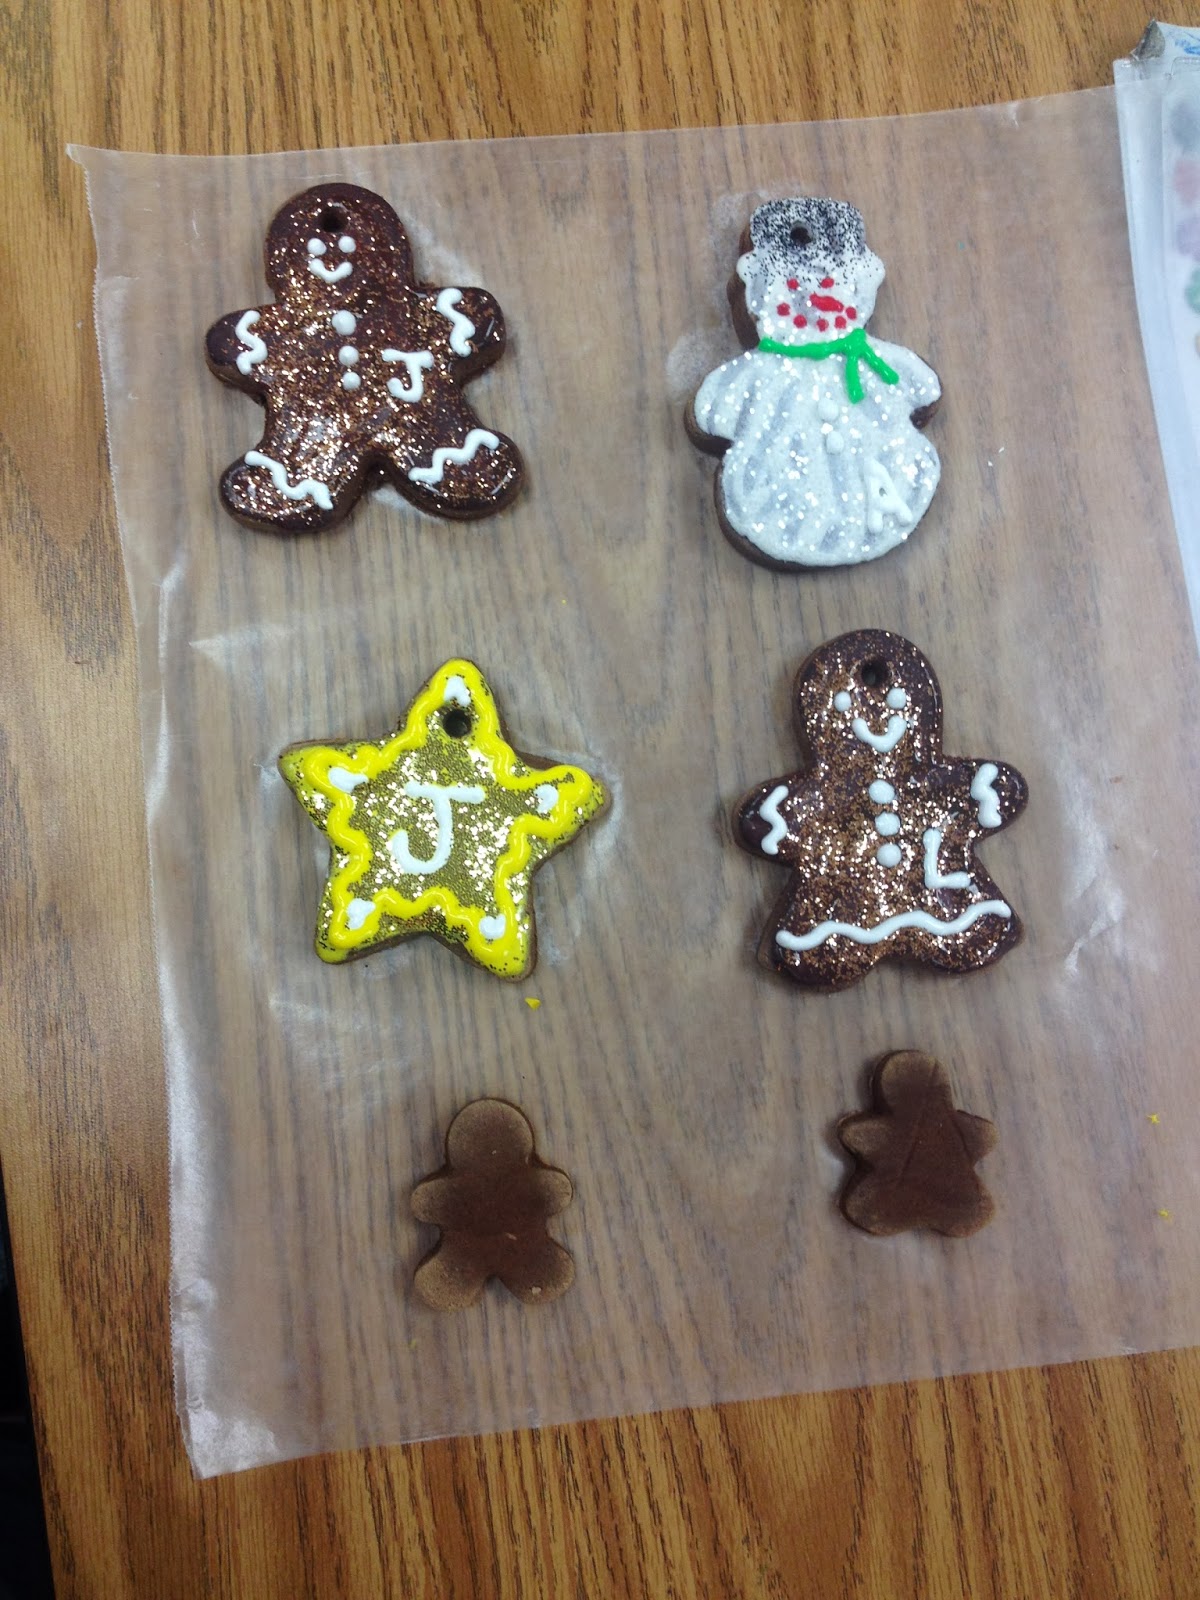
Every year I've done it different...once I've just let them stay brown, another year we just painted them.

It's like every year I have added more and more to it, lol.

This year, my kiddos painted them, we added glitter, I used puffy paint to add details, and I coated it with mod podge to give it a glossy look...oh my!


If your interested in making these next year, here is what I do:
Things you will need:
• Cookie cutters
• Drinking straw
• Ribbon or yarn
• Wax paper
• Gallon Sized Ziploc Bag
• Rolling pin
Ingredients:
• 1 cup of applesauce
• 1/4 cup of flour
• 1/2 cup of ground cinnamon
• 1 to 2 tablespoons white glue to start
Directions:
1. Mix applesauce, flour, and white glue with cinnamon to form a stiff dough. Don't add all of the glue at once. Drizzle a little glue at a time until dough reaches right consistency, not too wet, or crumbly.
2. Continue to add more apple sauce, cinnamon, flour, and glue until it forms into a thick dough. You want to make sure that it is not too sticky or too dry. I tend to eyeball it...after making these every year, you just know when the dough is 'just right.' We add more applesauce if it looks too dry, or more flour and cinnamon if its too sticky.
3. After the dough is thick, I place it in a gallon sized ziploc bag for it to stay fresh and moist. I give each student a small ball of dough (think of it as play dough). The students use small rolling pins (the ones that are used for play dough) to flatten it down. Afterwards they get to select a cookie cutter to cut the dough and make their ornament.
4. Move ornament to wax paper with a spatula and label their name on the wax paper to know who it belongs to while it dries.
5. Us a drinking straw to make a hole for ribbon or yarn. Set them aside to air dry for 1 to 2 days; turn ornaments occasionally to let it dry on both sides. Remind students that they cannot eat these since they have glue.
6. After they are dry, you can paint them, add glitter, and just about anything to make it look cute!;)
I even took some home so that I could make my house smell like cinnamon!! Yummy, yum! I made a bunch of them and had so much fun, heehee.


No comments:
Post a Comment